Going into the woods with nothing but a plastic bag and optimism is a recipe for trouble. Responsible foragers carry specific gear designed to:
Start with Safety: Gear Before Harvest
- Support accurate species identification
- Reduce exposure to toxins, thorns, and ticks
- Prevent habitat damage and overharvesting
Below is a checklist of 12 must‑have items, along with how each one directly supports safe, respectful foraging.
1. Regional Field Guide (Plants and/or Fungi)
A regional guide is your primary safety tool. Choose one with:
- Multiple photos per species: whole plant, leaves, flowers/fruit, habitat
- Clear notes on look‑alikes, especially poisonous ones
- Details on seasonal timing and preferred habitat
Example – Wild Carrot vs. Poison Hemlock:
- Wild carrot (Daucus carota): Hairy stems, often a single dark floret in the center of the flower, carroty smell; fields and roadsides, mid‑summer.
- Poison hemlock (Conium maculatum): Smooth stem with purple blotches, unpleasant mousey odor; moist ditches and edges, similar season.
Your guide should show these features and warn clearly that hemlock is deadly.
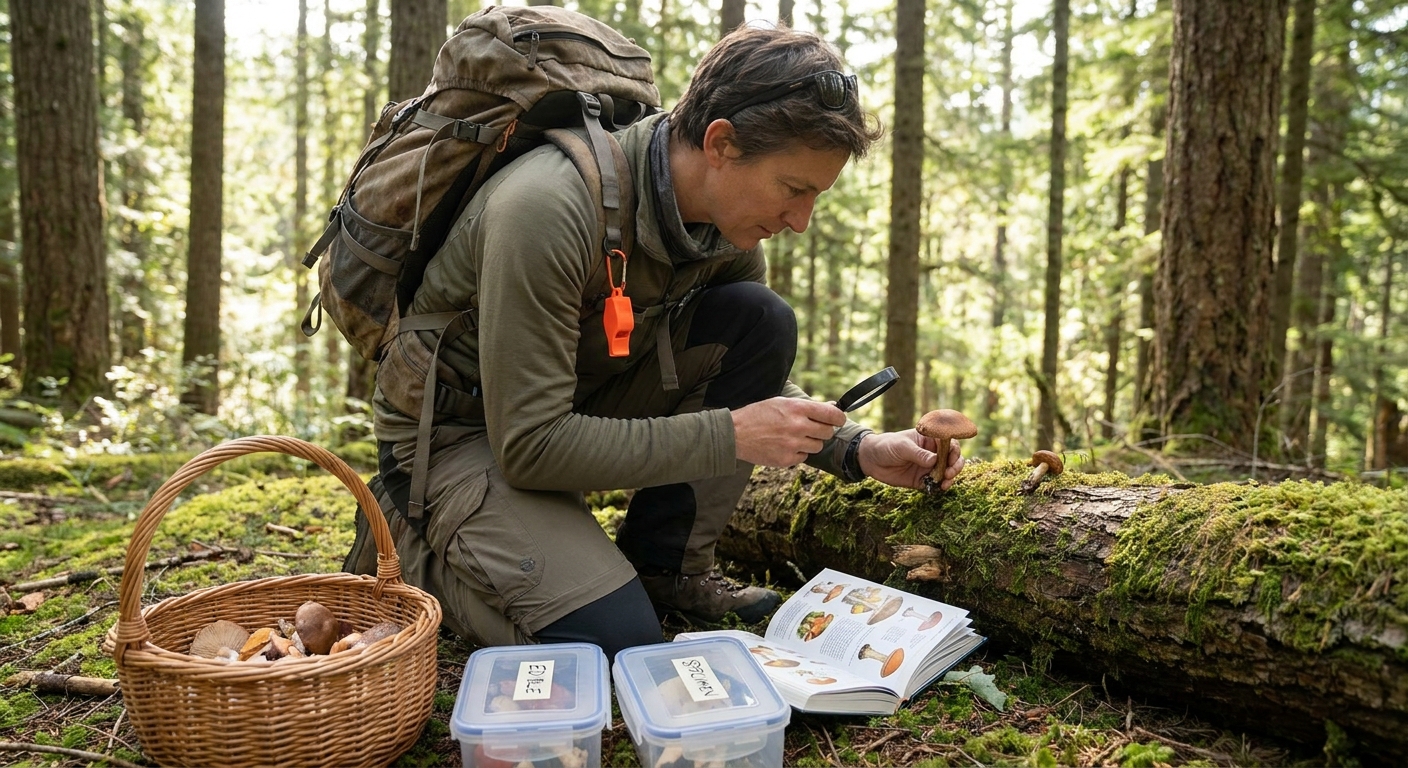
2. Hand Lens (10x) for Fine Details
A small magnifier turns confusing plants and mushrooms into recognizable individuals:
- Inspect leaf hairs and edges
- Examine mushroom gill structure
- Check fine patterns on seeds and cones
Example – Blueberries vs. Toxin‑Containing Look‑Alikes:
- Wild blueberries (Vaccinium spp.) have a small crown at the blossom end and grow on low shrubs, often in acidic, open woods and barrens.
- Some nightshade species produce somewhat similar blue‑black berries, but usually on herbaceous plants with distinct star‑shaped flowers and different leaf texture.
A lens helps you examine leaf veins and flower remnants while your field guide confirms the match.
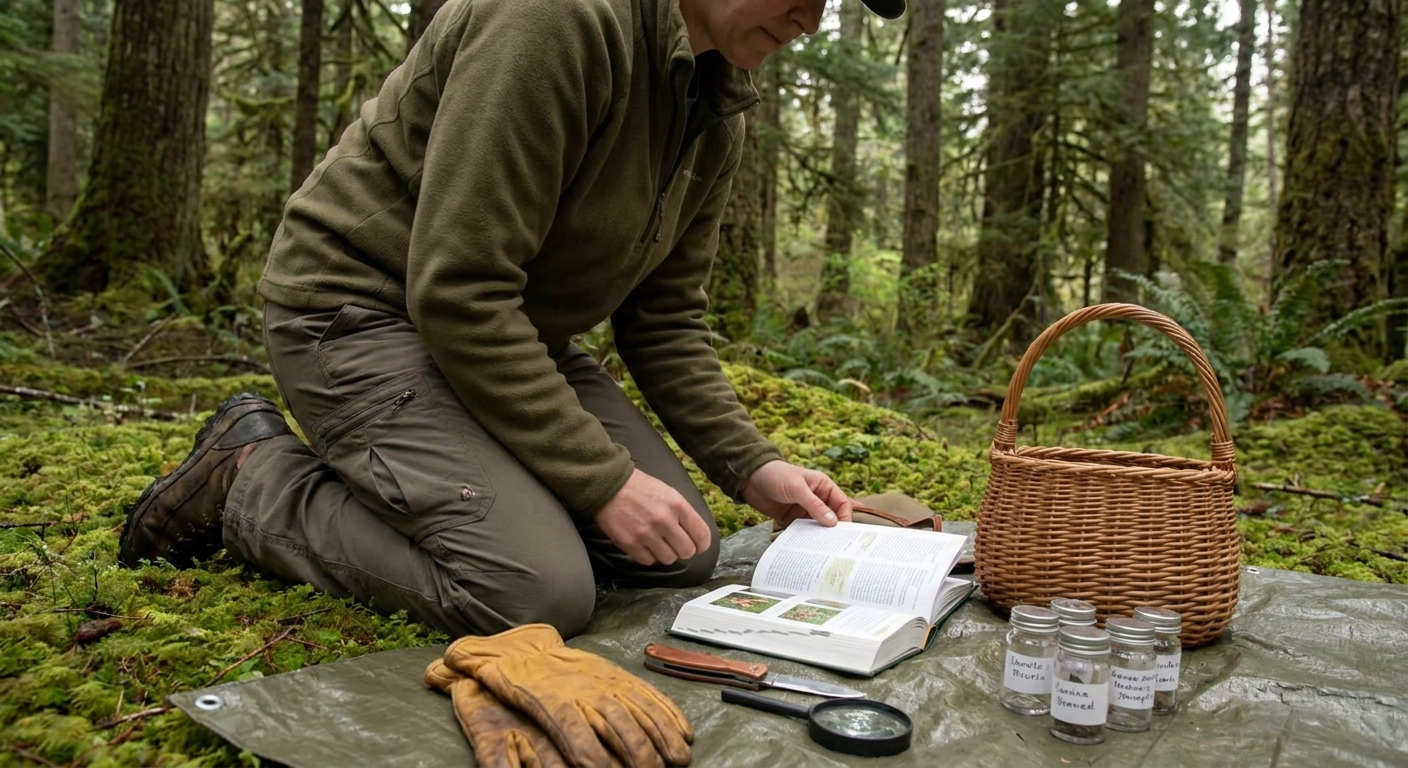
3. Notebook, Pencil, and Labels
Memory fades; ink doesn’t. Use a small waterproof notebook to record:
- Date, time, weather
- Habitat (forest type, soil moisture, nearby species)
- Detailed notes beyond photos (smell, taste if safely tested later, bruising colors)
Then, label each bag or basket compartment with:
- Provisional ID
- Location
- Any doubts or questions
This is crucial when comparing species later at home.
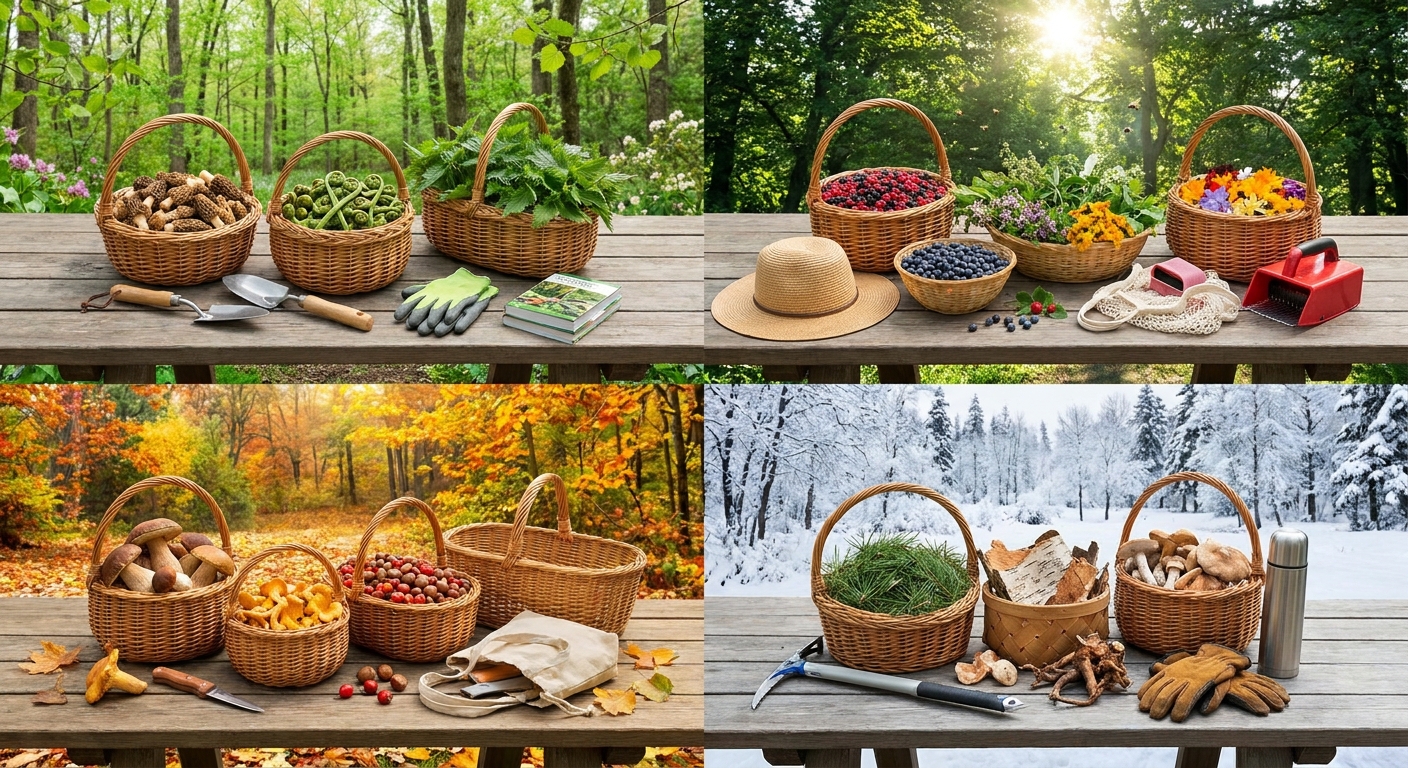
4. Separate Containers: Basket + Paper Bags
Never mix different unknown mushrooms or plants together. If a toxic species breaks up inside a mixed bag, it can contaminate everything.
Pack:
- A sturdy basket for airflow and protection
- A stack of paper bags to separate individual species
Example – Honey Mushrooms (Armillaria spp.) and Deadly Look‑Alikes:
- Honey mushrooms grow in clusters on wood, with a ring around the stem; autumn fruiters.
- Some deadly Galerina species can appear in similar habitats; they are smaller but can mix into clusters.
Using separate paper bags and labeling them lets you inspect each collection carefully at home, discarding anything that raises doubt.
5. Knife with Sheath
A sharp, controllable blade allows you to:
- Harvest cleanly (minimizing harm to the organism)
- Examine bases of plants and mushrooms without tearing them apart
Example – Chanterelles (Cantharellus spp.):
- Look for blunt, forked ridges instead of sharp gills.
- Habitat: On soil in mixed or conifer woods, usually mid‑summer to early fall.
- Potential confusion: Jack‑o’-lantern mushrooms (Omphalotus spp.) with true gills, often on wood.
Cut a sample cleanly and inspect the underside and base; a knife helps preserve these ID features.
6. Gloves: Nitrile and Work Gloves
Hands are your main contact point with plants and soil. Protect them.
- Nitrile gloves: For handling unknown plants and potentially toxic species.
- Thick gardening or leather gloves: For brambles, rose thorns, rocky or woody ground.
Example – Stinging Nettle (Urtica dioica):
- Valuable edible and fiber plant; best young shoots appear early spring in moist, rich soils.
- Hollow stinging hairs can deliver formic acid and histamine.
Gloves allow careful harvest while you learn to recognize nettle vs. similar‑looking, non‑stinging mints.
7. Map, Compass, and Offline Navigation
Even short scouting trips can turn confusing in dense woods or low light. Navigation gear protects you from:
- Getting lost while chasing a promising patch
- Being forced to rush identifications because daylight is fading
Pre‑load offline maps on your phone and bring a physical map and compass. Mark habitat zones (e.g., pine stands, bog edges) where certain species like cranberries or boletes tend to thrive.
8. First Aid Kit with Forager‑Specific Items
Basic first aid is essential. Tailor it to the realities of field work:
- Adhesive bandages, gauze, and antiseptic wipes
- Tweezers (for thorns and ticks)
- Antihistamine tablets or cream
- After‑bite or burn gel for nettle stings and mild reactions
If you have known allergies (e.g., to bee stings), your emergency medications are non‑negotiable gear.
9. Water, Snacks, and a Small Trash Bag
Dehydration and fatigue lead to poor decisions, rushed IDs, and navigation errors.
- Carry enough water for the entire outing.
- Bring high‑energy snacks so you’re not tempted to taste unverified plants out of hunger.
- Pack a trash bag: removing litter from wild spaces is part of foraging ethics, and you’ll often find more rubbish than mushrooms.
10. Camera (or Thoughtful Phone Photography)
Photos extend your learning beyond the field.
For each specimen, capture:
- Habitat shot (forest type, ground cover, moisture)
- Whole plant or mushroom
- Close‑ups: cap, gills/pores, stem, leaf arrangement, flowers or fruit
Examples that benefit from careful photo sets include:
- Morels (Morchella spp.) vs. false morels (Gyromitra spp.): True morels are hollow inside; false morels often have chambered interiors and different cap attachment.
- Oyster mushrooms vs. white look‑alikes: Photos of host tree bark and gill attachment are crucial.
You can later compare your photos to multiple field guides and expert resources before ever eating.
11. Seasonal Clothing and Tick Protection
Clothing is gear. Choose:
- Long pants and sleeves to reduce contact with poison ivy, nettles, and brambles
- Light colors to make ticks easier to spot
- A hat for sun and branch protection
Where ticks are common, add:
- Gaiters or long socks tucked over pants
- Tick repellent on clothes (follow regulations and safety guidance)
End every foraging day with a full tick check, especially behind knees, around waistbands, and in hair.
12. Ethics and Regulation Kit: Permits, Bags, and Boundaries
Safe foraging is also about legality and sustainability.
- Permits or passes: Some lands require foraging permits; carry them.
- Small, measured containers: Encourage you to harvest modestly; if you run out of space, you’re done.
- Knowledge of local rules: Some mushrooms (like truffles or chanterelles) may have harvest limits or be protected.
Remember: a healthy patch is one where you leave plenty of mature specimens, ensure reseeding or spore dispersal, and disturb soil and roots as little as possible.
The Checklist in Practice
Before each outing, review:
Field guide and hand lens
Notebook, pencil, labels
Basket and paper bags
Knife with sheath
Nitrile and work gloves
Map, compass, or GPS with offline maps
First aid kit and personal meds
Water, snacks, trash bag
Camera or phone with space for photos
Season‑appropriate clothing and tick protection
Permits or permission for the land
Containers that limit overharvest
Combined with a firm rule—“If I’m not absolutely sure, I will not eat it”—this gear list transforms enthusiastic beginners into cautious, long‑term foragers who can enjoy wild foods without needless risk.