Enthusiastic new foragers often obsess over recipes and flavor notes, but your gear is what keeps you safe, legal, and respectful of the land. A well-thought-out kit helps you:
Why Your Foraging Gear Matters More Than Your Recipe
- Identify species accurately (and avoid toxic look‑alikes)
- Harvest cleanly without damaging habitats
- Store finds safely until you confirm IDs at home
- Navigate changing conditions and seasons
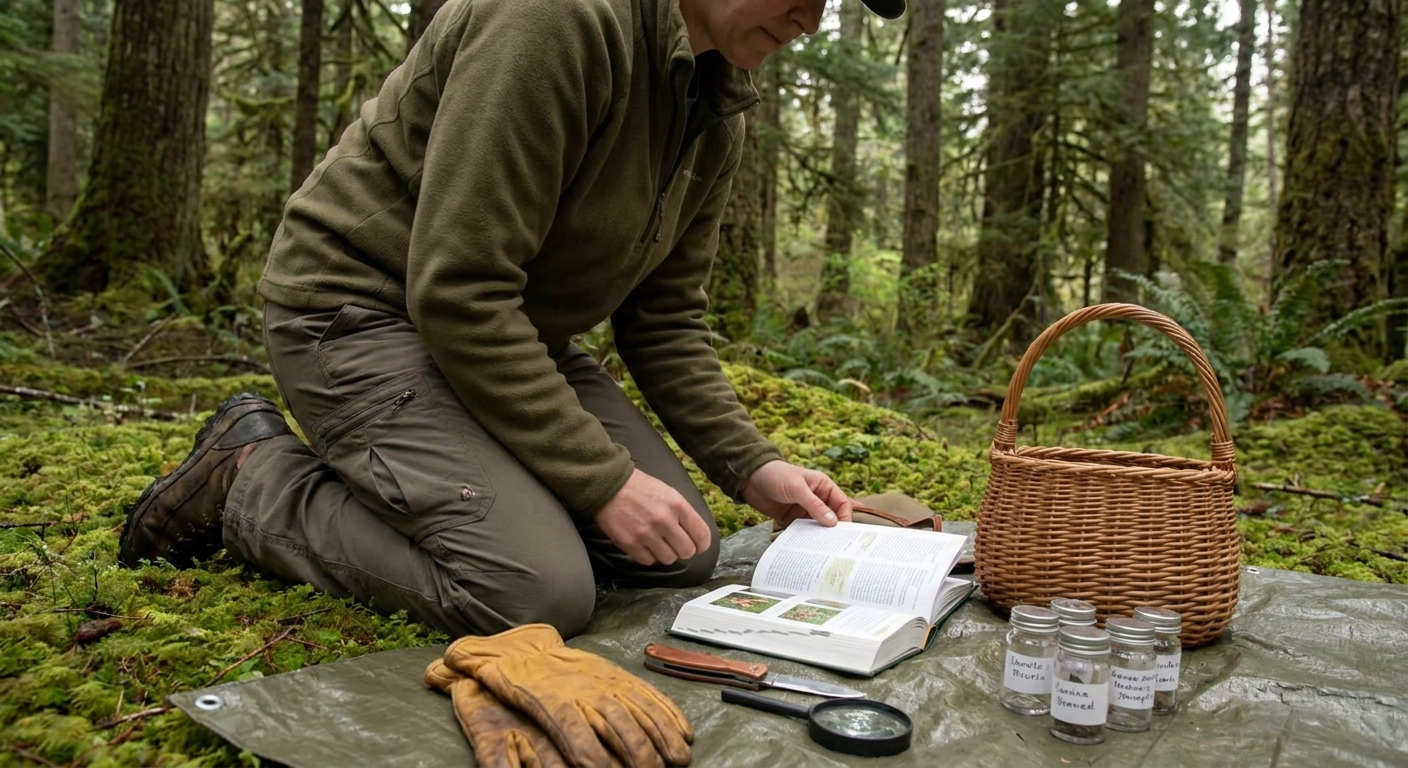
Think of your foraging kit as a mobile safety system. In it, every item should have a job that supports correct identification, ethical harvest, and personal safety.
Core Identification Tools (Your First Line of Defense)
1. Field Guides (Yes, More Than One)
Relying on a single book is risky. At minimum, carry:
- Regional field guide with photos: Focused on your area’s flora or fungi.
- Technical key or flora: Helps with fine details like leaf arrangement, spore color, and gill attachment.
When assessing a plant or mushroom, your gear should help you confirm:
- Habitat: Woodland edge vs deep forest vs wetland.
- Season: Early spring greens vs autumn fruiting bodies.
- Morphology: Cap shape, stem texture, leaf veins, smell.
- True chanterelles grow in soil near trees, often in mossy conifer or mixed woods, typically summer to early fall.
- Look‑alikes: Jack‑o’-lantern mushrooms (Omphalotus spp.) grow on wood, have true gills (not blunt ridges), and can cause severe GI upset.
Example: For chanterelles (Cantharellus spp.):
A good guide plus notes in the field will help you verify these distinctions.
2. Smartphone + Offline ID Resources
A phone is not a substitute for real identification, but it’s a powerful backup:
- Take clear photos: Cap, underside, stem, base, surrounding habitat, and a spore print later.
- Use offline apps or PDFs of trusted keys when you lose signal.
Avoid “snap-and-ID” apps for edible decisions. Use them only as a starting hypothesis, then confirm with books, habitat, and season.
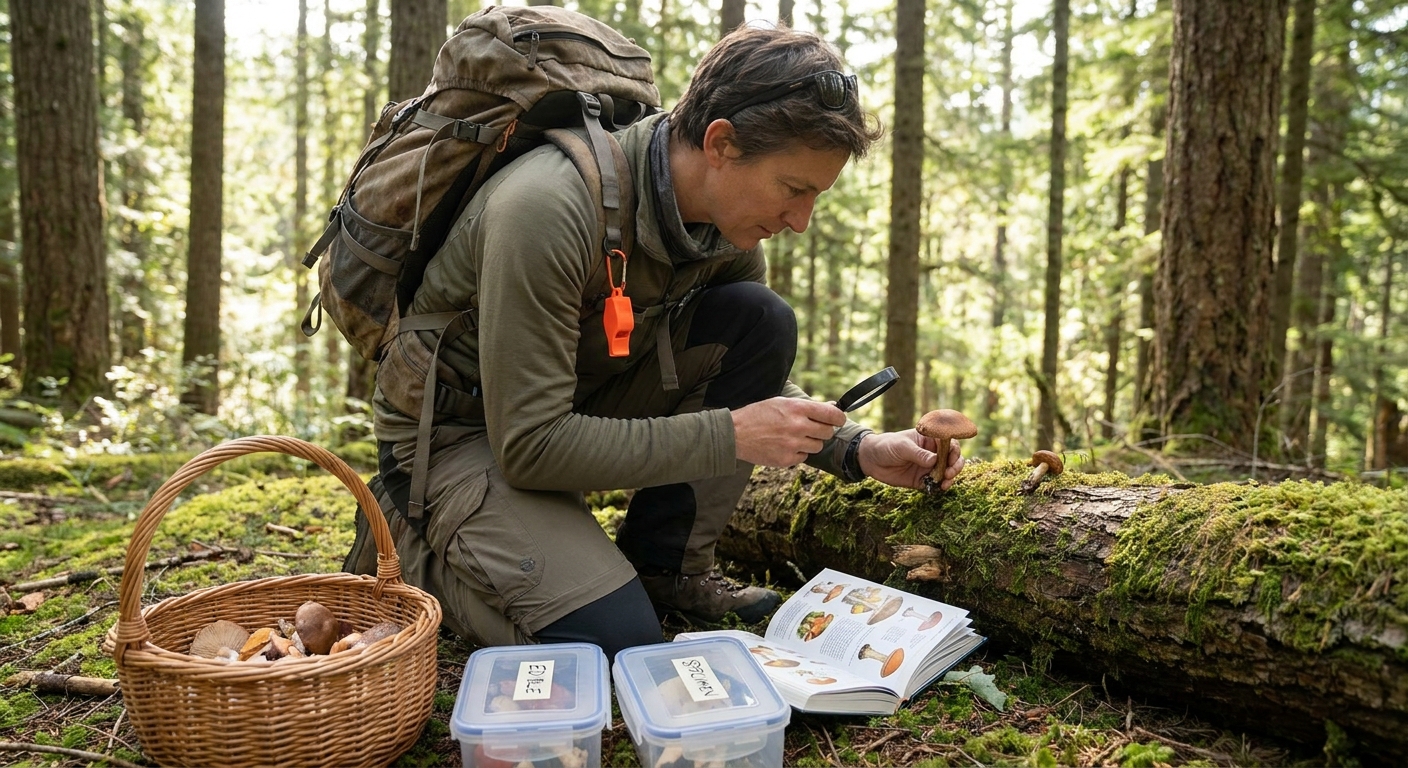
3. Hand Lens or Pocket Magnifier (10x)
A small hand lens reveals structures that separate safe from dangerous:
- Fine hairs on stems and leaves
- Vein patterns on plants like plantain (Plantago spp.)
- Gill edge details in mushrooms
Example – Identifying Stinging Nettle vs. Look‑alikes:
- Stinging nettle (Urtica dioica): Opposite, serrated leaves, tiny stinging hairs along stems and underside of leaves; often near disturbed, nitrogen‑rich soils from spring through early summer.
- Look‑alikes: Dead nettle (Lamium spp.) has no stinging hairs and square stems; henbit (Lamium amplexicaule) has rounded leaves. A lens helps you spot hair types and leaf textures.
Harvest Tools That Protect You and the Habitat
4. Cutting Tools: Knife & Folding Saw
Carry a small, sharp knife with a sheath and, for woody species, a folding saw.
- For mushrooms: A narrow knife allows clean cuts at the base, leaving mycelium in the soil.
- For shoots and stems: Cut above where new growth emerges to encourage regrowth.
Example – Fiddleheads (Ostrich Fern, Matteuccia struthiopteris):
- Habitat: Moist, rich soils near streams and floodplains; early spring.
- Look‑alikes: Bracken fern (Pteridium aquilinum) can be toxic; it emerges in drier, open areas with fuzzier fiddleheads and a different frond shape.
- Gear usage: Use your knife to cut only a few snaps per crown, leaving most to unfurl, and harvest only from confirmed ostrich fern patches.
5. Gloves (Chemical and Mechanical Protection)
Pack two types when possible:
- Nitrile gloves: For handling unknown plants or potentially toxic species while studying them.
- Sturdy work gloves: For thorny plants (blackberries, wild roses) and rocky, woody terrain.
Example – Nettles & Poison Hemlock:
- Nettles sting; gloves prevent immediate skin irritation.
- Poison hemlock (Conium maculatum), a deadly carrot family member, can be absorbed through skin to a small extent; you want full hand protection when removing it from paths or sampling for study. Look for purple blotches on the stem and a mousey odor, typically in moist soils along roadsides and streams.
6. Baskets, Mesh Bags, and Breathable Containers
Avoid plastic shopping bags for fresh finds. They trap moisture and heat, which can accelerate spoilage and blur identification features.
- Rigid baskets: Ideal for mushrooms – prevent crushing, allow airflow.
- Mesh bags: Helpful for some wild fruits and nuts – dirt falls away, and airflow slows mold.
- Paper bags: Essential for mushrooms you’re still studying; label with location, habitat, and date.
Example – Puffballs vs. Amanita Buttons:
- True edible puffballs (e.g., Calvatia, Lycoperdon spp.) are solid white inside when sliced vertically.
- Amanita buttons (some deadly) can look similar outside but show developing gills and cap structure inside.
- Gear use: Carry a small knife and paper bag. Slice each find in the field. If you see any internal structure besides solid white, discard. Never mix unidentified species with confirmed edibles.
Navigation and Safety Essentials
7. Map, Compass, and/or GPS
Do not assume cell service. Basic navigational gear includes:
- Physical map of the area
- Compass and knowledge of how to use it
- GPS device or phone with offline maps as backup
Mark fruitful habitats (e.g., chanterelle patches in damp mossy spruce woods) but keep exact spots private or share only with trusted foragers to prevent overharvesting.
8. First Aid Kit Tailored to Field Hazards
Include:
- Bandages, antiseptic wipes
- Tweezers for splinters and ticks
- Antihistamine for allergic reactions
- After‑sting / burn gel (for nettles, minor scrapes)
Combine this with clothing as gear: long pants, long sleeves, and sturdy boots help prevent:
- Ticks (Lyme risk in many regions; check yourself after trips)
- Scratches and contact with poisonous plants like poison ivy
Documentation Gear: Notes, Labels, and Samples
9. Waterproof Notebook and Pencil
For serious learning, record:
- Date and time
- Weather conditions
- Habitat: soil type, tree companions, elevation
- Descriptions beyond photos (smell, texture, color changes)
Example – Chicken of the Woods (Laetiporus spp.):
- Habitat: On hardwoods (oak, cherry) or sometimes conifers; bright orange shelf mushrooms, late spring to fall.
- Some people react poorly to specimens from conifers and eucalyptus.
- A notebook helps you track: tree species, exact location, personal reactions after consumption – building your own safety record.
10. Labels and Small Containers
Bring:
- Paper envelopes for seeds and small samples
- Painter’s tape and a marker to label bags and baskets
Never toss different species together. Keep everything separated until you’ve confidently identified each one at home.
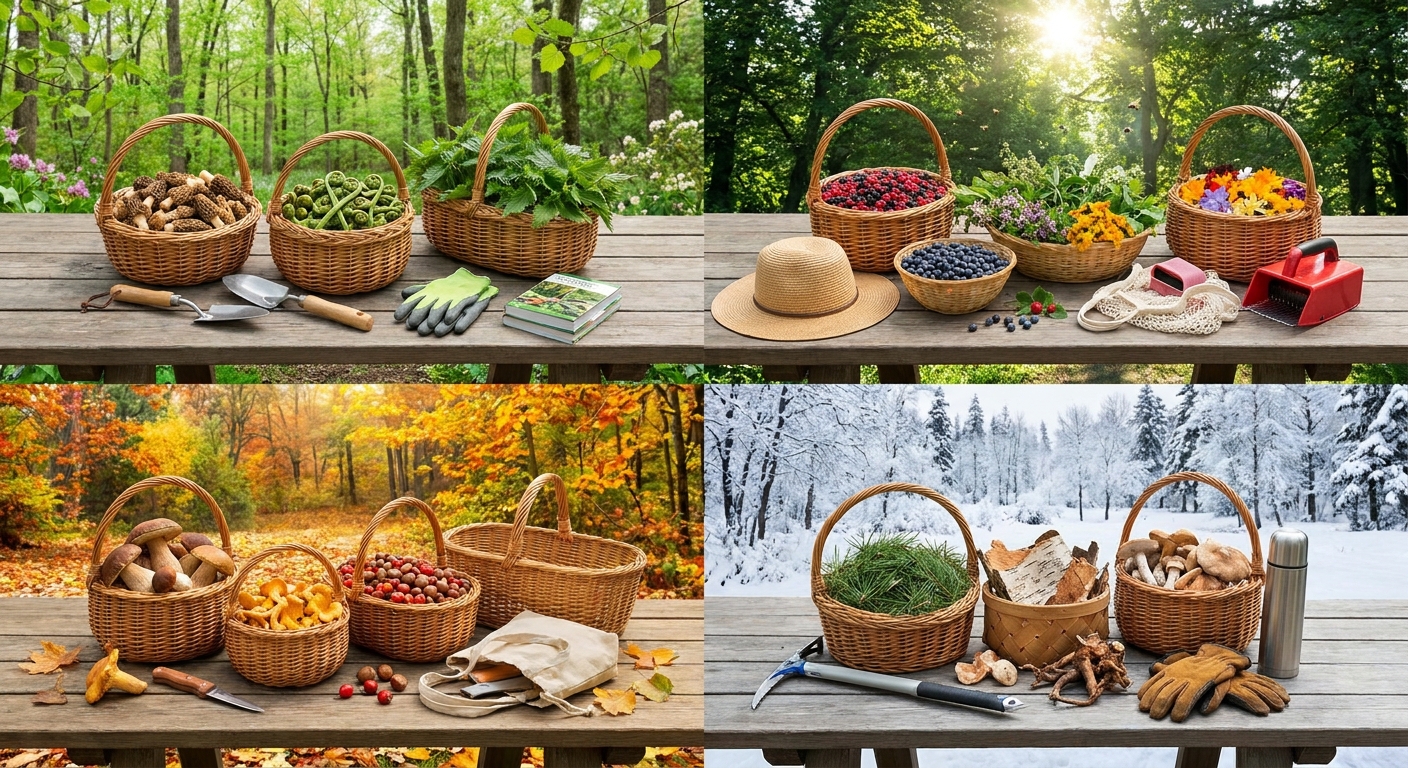
Seasonal Adjustments to Your Gear
Your kit should shift slightly with the season and target species.
Spring Gear Add‑Ons
- Extra gloves for nettles and thorny shoots.
- Small trowel (if your local regulations allow) for bulbs and roots like wild garlic (Allium ursinum in Europe) or ramps (Allium tricoccum in North America). Always check regulations and never strip a patch.
Look‑alike caution – Allium species:
- True edible alliums smell strongly of onion or garlic when crushed.
- Toxic look‑alikes like death camas (Toxicoscordion venenosum) lack the onion scent and appear in similar open meadows. Your most important gear here is your nose and careful scrutiny.
Summer Gear Add‑Ons
- Sun protection: Hat, sunscreen.
- Extra water and a small cooler in your vehicle for delicate greens and berries.
Berries like blackberries vs. nightshade berries require careful ID:
- Blackberries (Rubus spp.): Aggregate berries made of many small drupelets; grow on thorny canes, typically mid to late summer in brambles.
- Deadly nightshade relatives: Individual shiny berries on non‑thorny herbaceous plants; leaf and flower structure are very different. A field guide and clear photos are essential.
Autumn Gear Add‑Ons
- More baskets or separate containers for multiple mushroom species.
- Wax paper or parchment sheets to layer between mushrooms.
For gilled mushrooms like oyster mushrooms (Pleurotus spp.):
- Habitat: On dead or dying hardwoods; overlapping, shelf‑like, whitish to gray caps with decurrent gills, often late fall.
- Look‑alikes: Angel wings (Pleurocybella porrigens) and other pale mushrooms; some linked to illness in certain individuals.
- Your gear: Knife, paper bags, and a notebook to document host tree and region; you may decide to avoid white “oyster‑like” mushrooms if you can’t be absolutely certain.
The Mental Gear: Rules You Carry in Your Head
Your physical kit only works when paired with mental rules:
- If in doubt, leave it out. Even if your gear suggests a likely ID, uncertainty means it stays in the forest.
- New species: 3‑step adoption.
- Study for at least one full season.
- Confirm with multiple sources and, ideally, a mentor.
- Try a small portion once you are 100% sure, keeping detailed notes.
- Never rely on one trait. Edible vs. toxic often hinges on a combination of habitat, season, smell, bruising color, and microscopic features.
Putting It All Together: A Practical Pack List
A balanced, safe foraging day pack might include:
- Two field guides (regional general + mushrooms or plants focus)
- Phone with offline maps and photos
- Hand lens (10x)
- Knife with sheath; small folding saw
- Nitrile and work gloves
- Basket, mesh bags, and paper bags
- Map, compass, and/or GPS
- Small first aid kit
- Waterproof notebook, pencil, labels, and envelopes
- Seasonal extras (trowel, cooler, sun and tick protection)
Treat your kit as evolving. After each trip, note what you wished you had and what you carried but didn’t use. Over time, your gear will mirror your local landscapes and your favored species—and most importantly, it will keep you foraging safely for years to come.